Highly Available 3-Tier Architecture Web Application in AWS

A 3-Tier Architecture is made up of 3 separate tiers (hence the name), and they are: the Presentation Layer, or Web Tier, The Application Tier, and Database Tier.
There are several benefits to this architecture in that it scales horizontally as it needs to (it adds EC2 instances to meet demand), thereby increasing performance due to the Web Tier caching images and content for easier retrieval. With multiple EC2 Instances, an Auto-Scaling Group (ASG) and an Application Load Balancer (ALB) and multiple AZ’s, the chances of a single point of failure are minimized.
Our task: to design and create a highly available 3 Tier architecture for your company’s new web application.
**Web Tier**
1. 2 public subnets
2. Minimum of 2 EC2 instances with an OS of your choice (free tier) in an Auto Scaling Group.
3. EC2 Web Server Security Group allowing inbound permission from the internet.
4. Boot strap static web page or create a custom AMI that already includes the static web page.
5. Create a public route table and associate the 2 public subnets.
**Application Tier**
1. 2 private subnets
2. Minimum of 2 EC2 instances with an OS of your choice (free tier) in an Auto Scaling Group.
3. EC2 Application Server Security Group allowing inbound permission from the Web Server Security Group.
4. Associate with private route table.
Note: This is not a true application tier as we don’t have any provided code to run on the EC2 instances.
**Database Tier**
- Use a free Tier MySQL RDS Database.
2. The Database Security Group should allow inbound traffic for MySQL from the Application Server Security Group.
3. 2 private subnets.
4. Associate with private route table.
Roll up your sleeves, it’s about to get wild. Let’s go!
Part 1: Web Tier:
First, we will create our Web Tier by creating a VPC with 6 subnets (2 public and 4 private), a Network Address Translation (NAT) Gateway, and Internet Gateway (IGW), and two route tables (1 public and 1 private). We’ll also choose a range of IPv4 CIDR Blocks.
When we log into our AWS account, we will type VPC into the search box and create a VPC Only (we’ll add the other components separately):

Click Create VPC. We need to enable DNS Hostnames, so highlight the VPC and click Actions → Edit DNS Hostnames, then choose enable, then click Save.
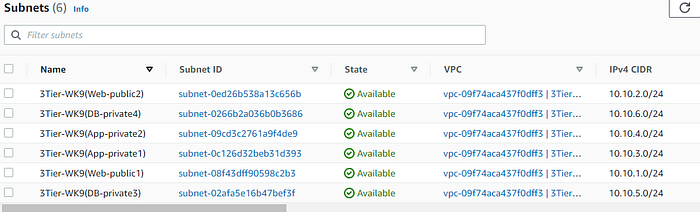
Next we need to create 6 Subnets — 2 public and 4 private. At the bottom of the first one, you can click Add new subnet five more times.
As you can see from my picture below, I chose the CIDR’s of 10.10.1.0/24 through 10.10.6.0/24 and made all the odd CIDR’s part of one group in us-east-1a and the evens part of the other in us-east-1b. When everything is done and you’ve double-checked all your settings and sets of CIDR’s, click Create Subnet.
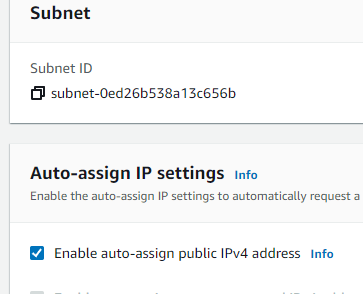
We need to make sure we enable IPv4 on both public subnets. Click on one of them, Choose Actions, then edit subnet settings. Check the box to Enable auto-assign IPv4 address, then click save. Repeat for the other public subnet.
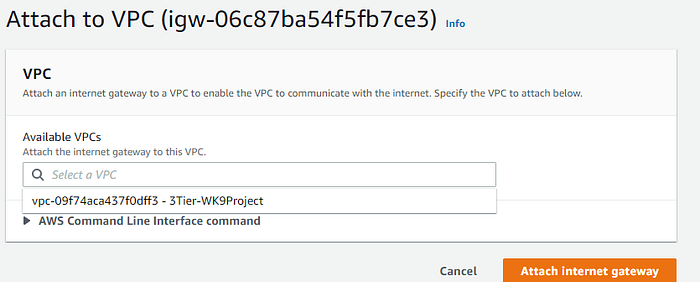
Next we’ll create the Internet Gateway by choosing Internet Gateway from the left side of the page, and Create Internet Gateway. Give it a name, choose the VPC that we created above. Then click Attach internet gateway.
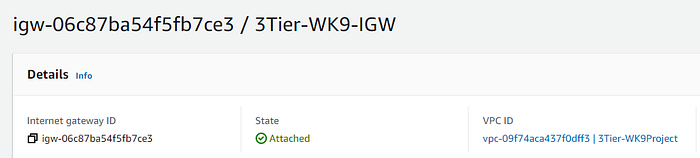
And Voila! Our IGW is now connected to the VPC:
Next up, let’s tackle the NAT Gateway. On the left side, click NAT gateway and create. On the next screen, fill in the following information:
Name: if you want; choose the public subnet you created above, Choose Public, and allocate an Elastic IP. Then click Create.
NOTE: Make sure you delete(release) the Elastic IP as soon as you are done with it, as it does incur a charge on your account.

Lastly, we’ll create some Route Tables. We will need to create a public and private. The public route tables will be mapped to our public subnets, and target the IGW, and the private Route tables will map to the NAT Gateway:
Choose Route tables from the menu on the left, and create Route Table. Give it a name (I chose 3Tier-WK9-RTPublic for the public RT). Choose the VPC you created above, then Create Route Table.
Next, we will add the Internet Gateway to this Route Table: click on the RT, and on the Routes tab, select Edit Routes, then Add Route. Type in 0.0.0.0/0 and the target is the IGW (scroll down — took me a second to figure that out). Click save, and we’ll add our two public subnets next.
Click on the Subnet associations tab, choose the two public subnets, then save.
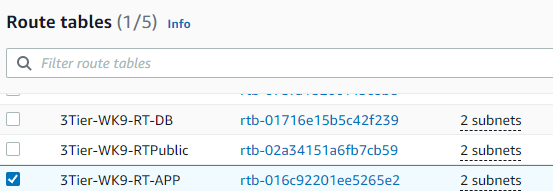
For the private route tables, I split mine up into App Tier and DB Tier. You’ll do the same thing that you did for the public subnet, but for the App Tier, you’ll target the NAT Gateway. You’ll also target the 2 private subnets (App-private1 and App-private 2 from the picture above).
Repeat the process for the DB subnets and choose them. You can combine all four private subnets into one Private Route Table — it’s personal choice. When done, it should look like this:
Whew! Still with me? Great! Next up: Application Load Balancers (ALB’s) x 2: one for the web tier to add an extra layer of security, and one to allow the web tier to communicate with the application layer. Web tier ALB first:
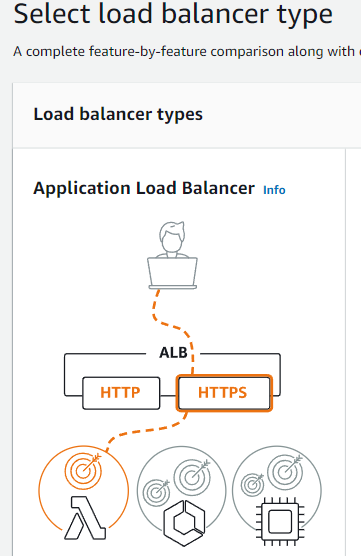
In the Management Console, navigate to EC2 and select Load Balancing, then Load Balancers. Click the blue Create Load Balancer button, then choose Application Load Balancer and click Create.
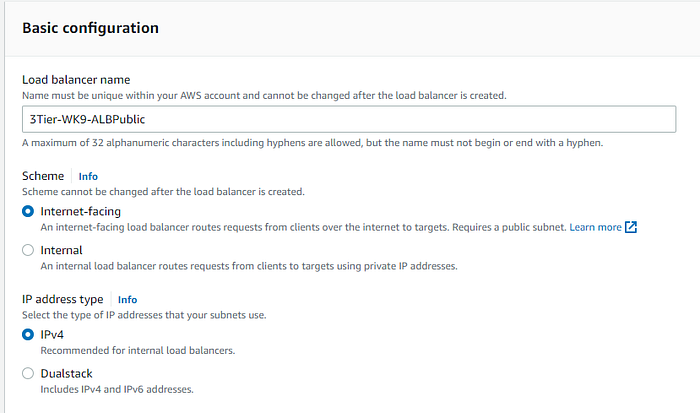
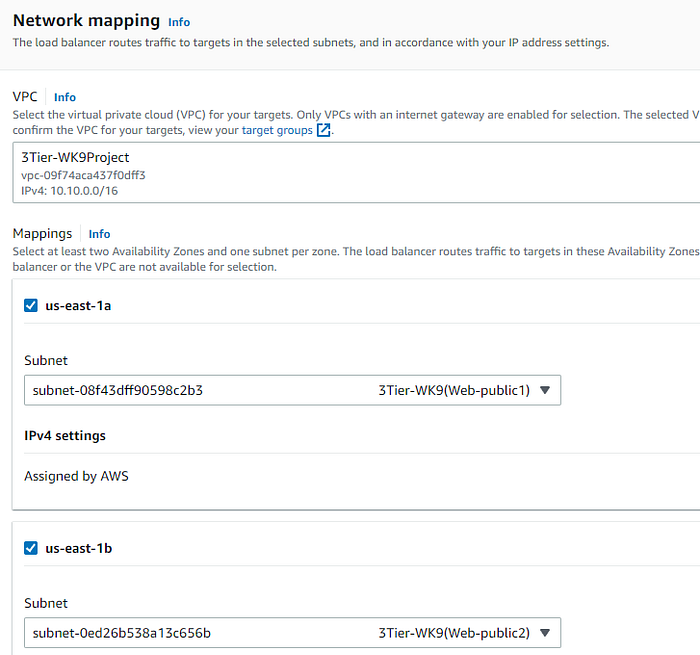
Scroll down and under Network Mapping, choose your VPC that you created above, then scroll down to the next section. Still under Network Mapping, make sure you check both boxes for the AZ’s that you want to use, as well as one subnet per zone. Mine were us-east-1a with the web-tierpublic1 subnet and us-east-1b with the web-tierpublic2 subnet.
Next down the list, we need to enter our Security groups. Click Create new security group, Give it a name, Description, and choose your VPC.
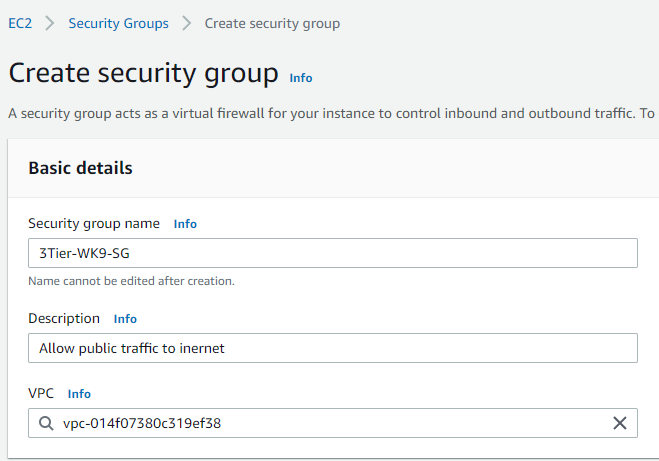
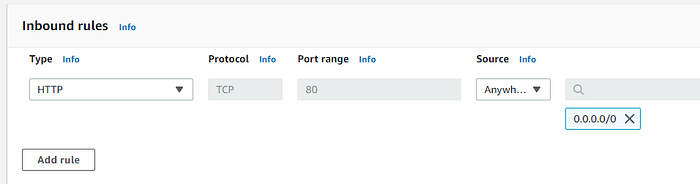
Under Inbound rules, we need to allow inbound permission from the internet.
Then click Create Security group.
Back in the Load Balancer set up, you should now see your Security Group.
Below that, under Listeners and routing, leave it at HTTP:80 and forward it to the Target Group that we can create by clicking on the blue button. It will take us to these screens:
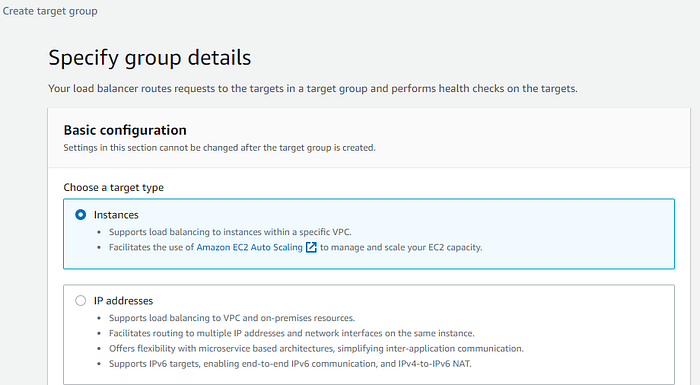
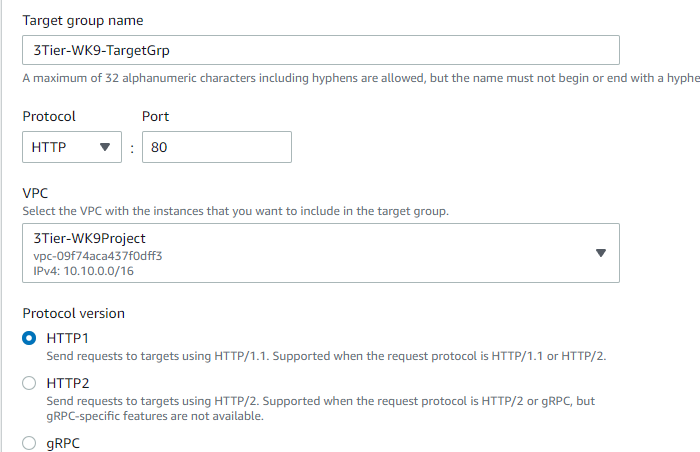
Scroll down and click Next and skip registering the targets, as we’ve not created EC2 instances yet. Click Create target group. Make sure you go back to the Load Balancer set up and choose the new target group.
Last step in this process, is to create the ALB for the private subnets. This is to allow the presentation layer and application layer to communicate. Follow the procedures above, but put the private subnets in (in my case, Apptierprivate1 and Apptierprivate2).
Let’s create our Web-Tier Auto-Scaling Group next:
We need to create two Auto-scaling groups: one for the web-tier and one for the application-tier. In the web-tier instances, we’re going to add a bootstrap in the User Data section to get a custom webpage to load.
First, under EC2, click create launch template, and enter the following:
- Template name (3Tier-WK9-ASGpublic)
- check the box for Auto Scaling Guidance,
- choose your AMI (Amazon Linux 2, t2.micro),
- Keypair: I created a new one, but you may use an existing one.
- Network settings:
- Give it a name, description, choose your VPC, and add a security group rule (SSH, from IPv4, anywhere), HTTP, source 0.0.0.0/0 and ICMP-IPv4 from 0.0.0.0/0.
Under Advanced Network Configuration, Add a network interface and choose Auto-assign public IP and enable it.
Under user-data, we’ll enter the following bash script to get a custom web page to load once the instance is fully up and running:

With that done, let’s create an Auto Scaling group for our web tier: go to EC2 → Auto Scaling Groups → create Auto Scaling Group. Here, we want to use the Launch Template we just created. Check out my article here on how to set up the ASG.
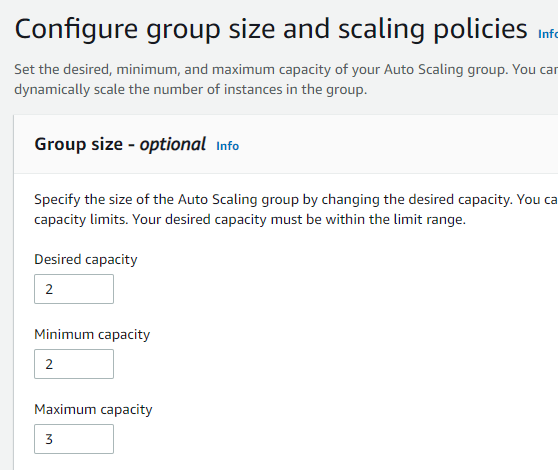
Per the parameters of our project, we were to have a minimum of two EC2 instances, which is why the desired and minimum capacity is set to 2. Max will be set to 3
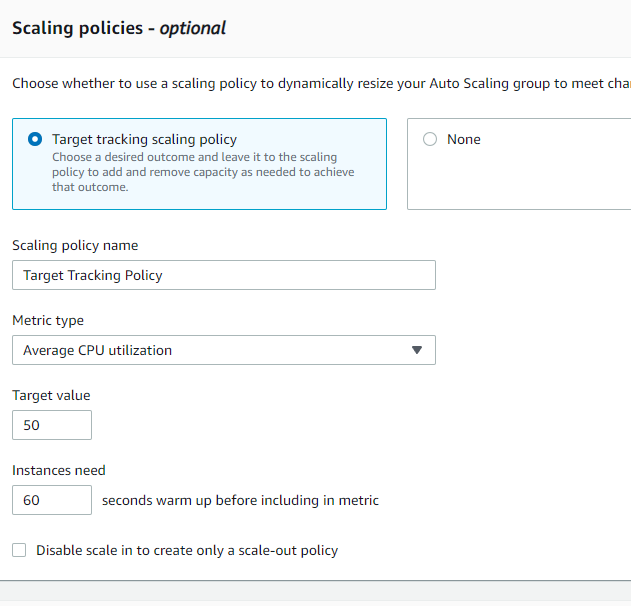
For the scaling policies, I enabled Target tracking, so it will scale out another instance if the CPU load exceeds the threshold I set (50%).
Application tier For this tier, I repeated the same set of instructions as above, but swapped out the private subnets for the ASG. This is due to the fact that there is no code to run on the EC2 instances for this project. Make sure you configure the App Tier security group to allow inbound permission from the web tier security group.
Finally, let’s create the Database tier, and check connectivity to the Application Tier:
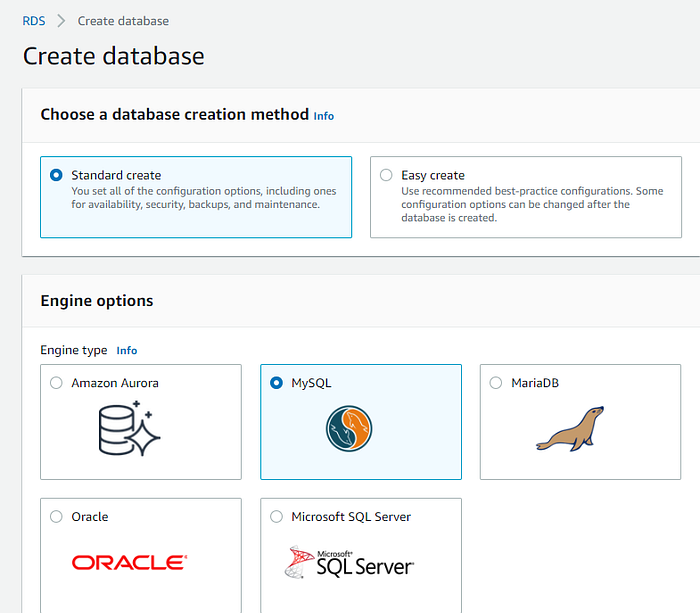
Search for RDS in the Console, and we’ll create a database, and ‘Standard create’ and Choose MySQL, per the instructions given:
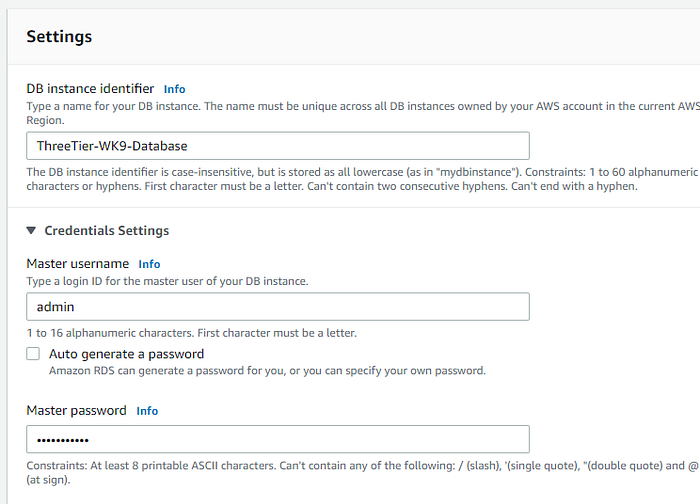
Then enter the name (Fun-fact, it can’t start with a number, hence the change in my name below), username and password.
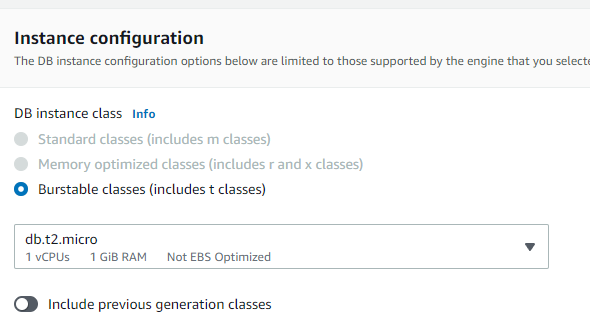
Since we’re on a free tier, we can change the Database to burstable db.t2.micro.
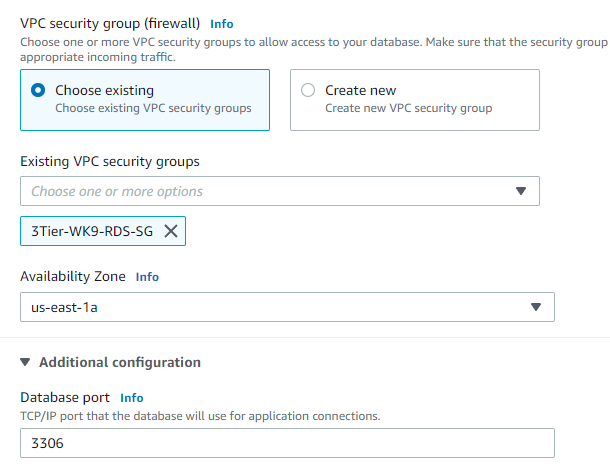
Keep the defaults until you get to Connectivity. Choose an existing security group or create a new one, choose the AZ, and notice that port 3306 is showing under additional configuration (you will need to change this later and point the source to the App-tier security group).
Further down, under Additional configuration, you can choose back up options. Give it a name and keep the default values.

If you want to use Multi-AZ deployment of an RDS instance, once the database is created, you can click on the RDS database and select Modify and Enable Multi-AZ deployment.
Verification:
Let’s test if we can access the web-tier from the internet. We will need to go to our running EC2 instances and choose one of the public ones and copy the Public IPv4 address and enter that in our browser.

Bingo! With that done, we’ll need to now test the communication of the web tier with the application tier by logging onto the AWS CLI:
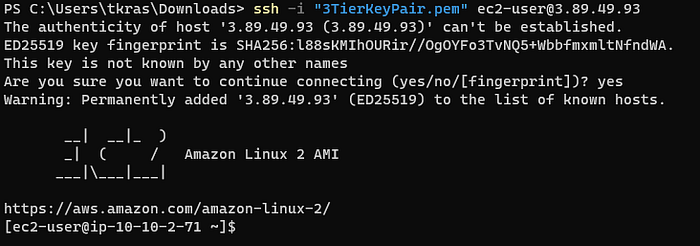
Then we’ll run the ping command on the private IPv4 address of our App Tier instance.
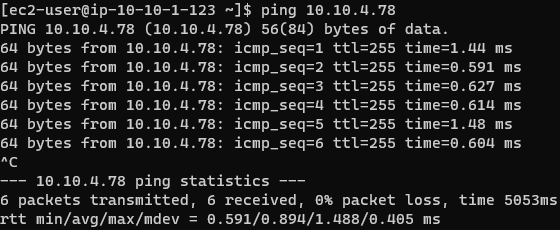
Success!! We are able to ping the app tier from the web tier.
Don’t forget to delete all resources used in this lab — it can incur some charges if left running. Make sure you disassociate/detach/delete where needed, including the database. Especially the NAT Gateway, and the Elastic IP address.
Thank you for taking the time to read my tutorial. I hope you found it helpful and please let me know if you have any questions or suggestions!